Quickstart Examples
The ndn-lite-docker-image has NFD and IoT System Controller pre-installed. It is highely recommanded to use it to save time. If it’s used as your development environment, please skip to Share QR Code and bootstrap Device.
Preparation
If you’re using Docker image, no more preparation is needed and please skip to Share QR Code and bootstrap Device. If you’re not using Docker image and start your build on macOS, additional software are required.
Start your NFD:
$ nfd-start
Notice: Please build ndn-cxx and NFD from source.
Download and execute ndn-iot-controller:
$ cd /path/to/controller
$ git clone http://github.com/named-data-iot/ndn-iot-controller
Install dependencies (if you’re using macOS or brew):
$ brew install zbar leveldb
Set up development environment:
$ python3 -m venv ./venv
$ ./venv/bin/python -m pip install -r requirements.txt
Run the controller server:
$ ./venv/bin/python app.py
Share QR Code and bootstrap Device
Top posting: If you feel difficulties in finding those pre-generated QR code, you can simply download from our repo
<project-root> is the ndn-iot-package-over-posix directory.
If you’re already in container’s root path, you need
$ cd ndn-iot-package-over-posix
to go into the project root.
Devices in smart homes, need to be boostrapped by a IoT controller to obtain credentials.
Thus the IoT controller should have some shared secrets between it and devices to validate bootstrap request.
The shared secrets, in our project, are in two formats: a txt file that be loaded by device program, and a QR code that be uploaded to IoT controller by users.
Three pairs of pre-generated shared secrets are in folder /<project-root>/devices.
Device programs in /<project-root>/examples will use two of them.
Hard-coded bindings between example device program and QR code are:
Device Program
Pre-generated QR Code
tutorial-app
device-398.png
tutorial-app-sub
device-24777.png
Additionally, you can generate shared secrets by following instructions Shared Secrets Generation.
Now it’s time bring your devices online.
Open controller’s UI in browser at 127.0.0.1:6060, then click Device Bootstrapping button, a blank for uploading QR code should show up, as shown in the following picture.
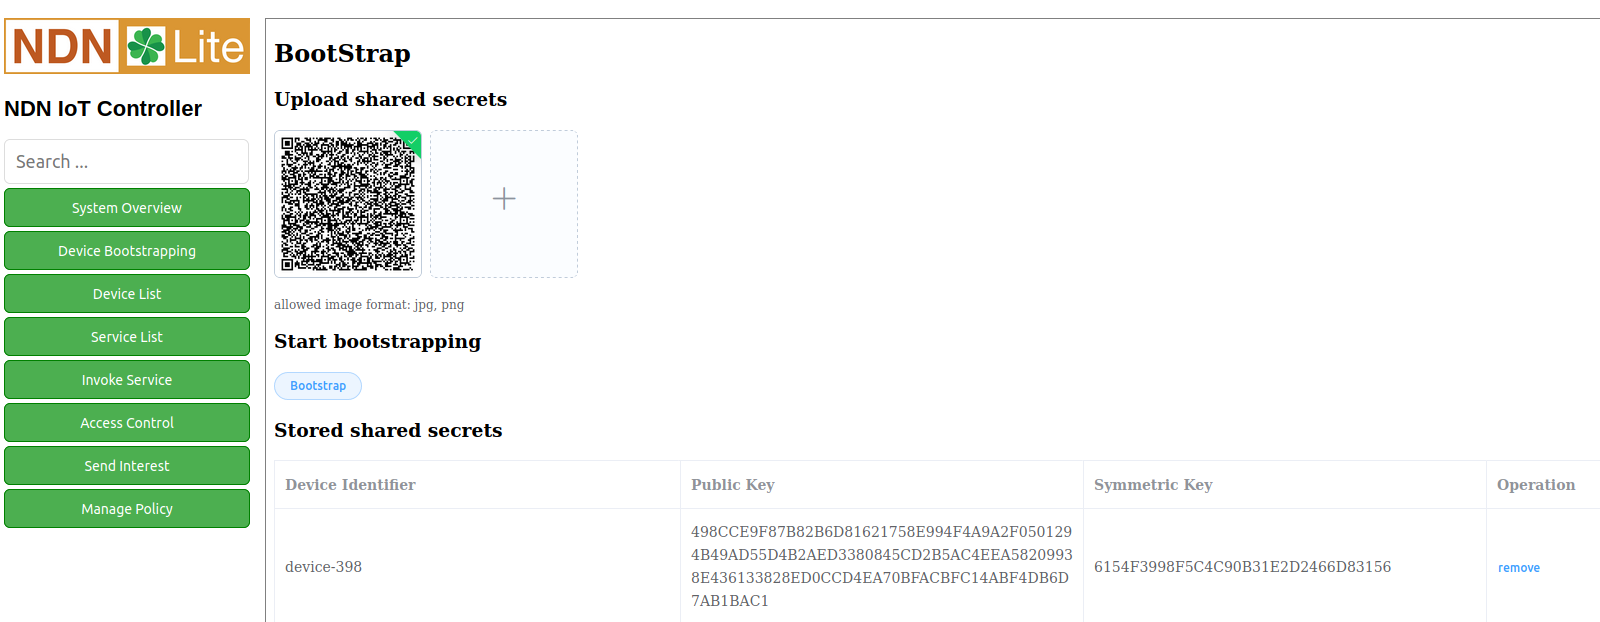
We upload device-398.png to the blank, and click bootstrap button, which enable controller waiting for bootstrapping request in the following 5 seconds.
Now run the corresponding device program inside this 5-second bootstrapping window:
$ cd /<project-root>/build
$ ./examples/tutorial-app
In this process, controller may ask for sudo, please give our access.
This device-398 has two functions:
Subscribe to LED command and adjust illuminance value based on command content
Publish a string
helloto a pre-defined topic every 400000ms
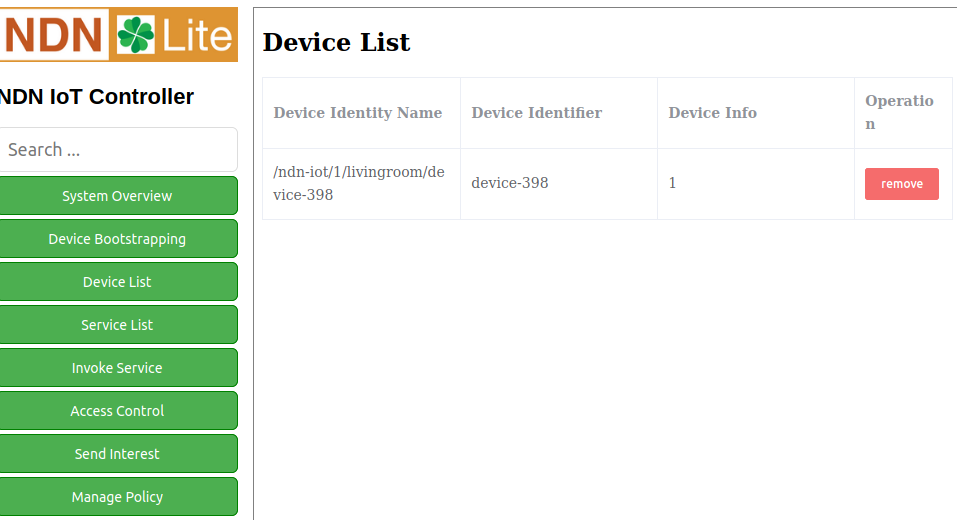
Note: When you stop a running ndn-lite application or disconnected a device and want to reconnect, you have to re-bootstrap the device. Before that, please delete the device from the controller. To do so, please use the “device list” page in controller and hit remove. As shown in the image below.
Failure to do so will crash the application with TLV Type (should be TLV_AC_KEYID) not correct error.
Play with Example Command
Click Invoke Service button, you shall see a form asking for interested service and command parameters:
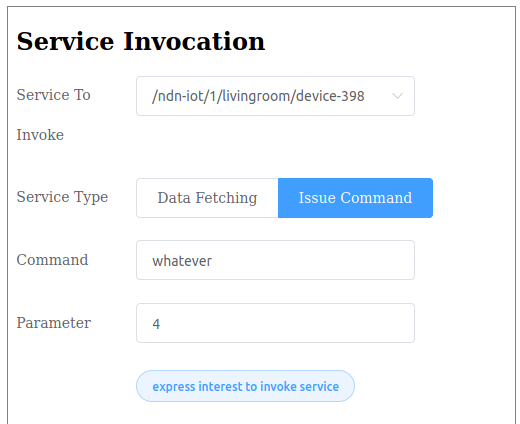
Given now only one device has been bootstrapped, only one service can be selected.
Then, select Issue Command.
Input any command id and input an integer between 0 and 100 as the parameter. This command is supposed to send LED brightness to the device. Send command by clicking express interest to invoke service, in the terminal which runs tutoriala-app, device side result should show.
Fetch a Published Content
Following similar steps with bootstrapping device-398 (please do not kill it), we can bootstrap device-24777 to the controller in another terminal by running tutorial-app-sub.
This device subscribes to the pre-defined topic where device-398 publishes its string.
After a while, the hello string should appeer in the terminal.